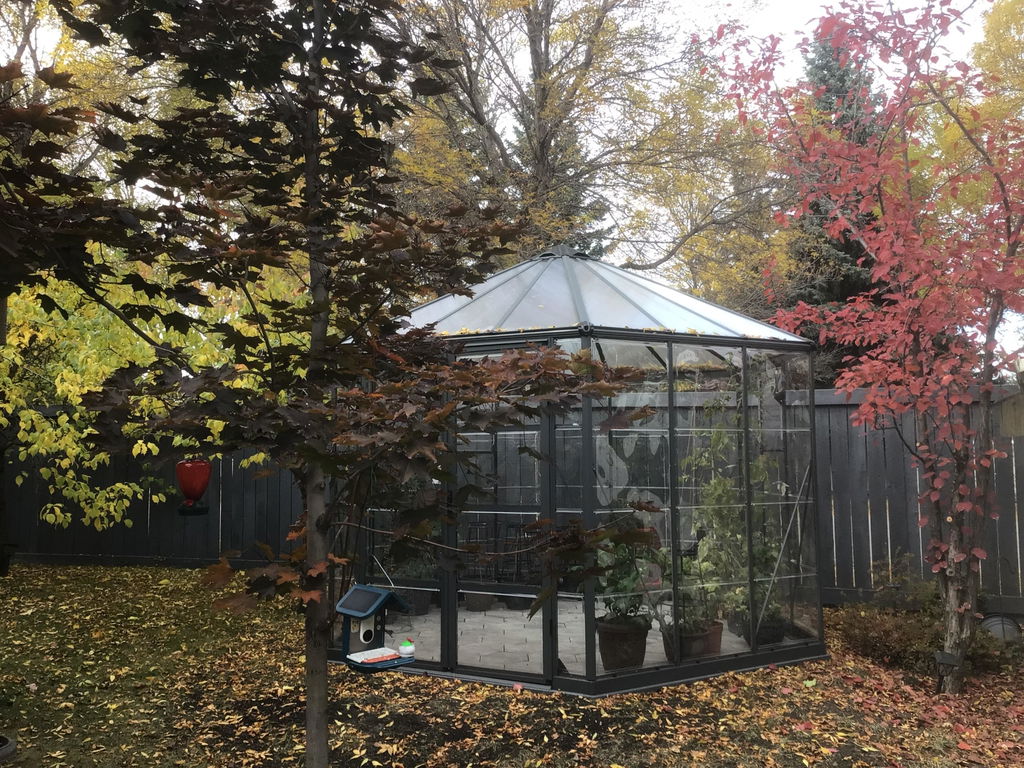
The same greenhouse, on four different foundationsA pressure-treated wood base, a concrete slab, a perimeter concrete footing (grade beam), and a wood deck. Any of them will carry a greenhouse.
Which foundation should you build?
This is the question we get on the phone more than any other. All six below work. Palram-Canopia lists concrete, pressure-treated wood, a wood deck and paver blocks as its recommended foundations, so the choice is really about how permanent you want it, what it costs, and what your ground is like.
Whichever you pick, it has to be sized right, and that part is not optional. Palram-Canopia's standard is a 5 inch bearing strip under the base rail. Step 2 covers it.
Step 1. Pick the type
MOST POPULARWood frame, above ground
Built straight on the surface. Fastest to put in, easiest to level with shims, and you can move it later. This is what most of our customers build.
6x6 cedar or pressure-treated lumberCLEANER LOOKWood frame, in-ground
The same frame set flush in a shallow trench. Tidier threshold, no step up. More digging, and harder to adjust once it is in.
6x6 cedar or pressure-treated lumberSLOPING GROUNDWood deck
A raised deck-style platform. The answer when the ground falls away, or when you want a solid floor you can sweep.
Cedar or treated lumber, above groundNO POUR NEEDEDPatio stones and pavers
Patio stones on a well compacted gravel pad. No concrete truck, and drainage looks after itself. The stones are not the foundation though, the compacted pad under them is. How to build one.
On Palram-Canopia’s recommended listPERMANENTConcrete perimeter footing
A poured perimeter with a rebar footing, also called a grade beam. The strongest option in an exposed, windy spot, and you keep soil inside for planting straight into the ground.
At least 6" wide, flush or half above gradePERMANENT, WITH A FLOORConcrete slab
A full pad that is foundation and floor in one. Easiest to keep clean. You give up in-ground planting, and you need to think about where water goes.
Concrete with rebar footing, flush or above grade
Rion owners have a second option. The EcoGrow, Grand Gardener and Prestige can sit on any of the foundations above, or on the Rion mounting base kit, which snaps onto the bottom of the greenhouse and can be filled with soil. The kit still needs a level, solid surface under it.
Three things decide whether a foundation works, whichever type you build: the bearing strip is wide enough, it is level and square, and it is solid all the way around the perimeter. Everything else on this page is detail hanging off those three.
Step 2. Size it
Palram-Canopia's standard is a 5 inch bearing strip under the base rail, the whole way around: 2 inches of solid foundation outside the rail, the 1 inch rail itself, and 2 inches inside it. Both the outside and the inside figures are in the assembly manual. Most people only read the outside one, and that is where foundations go wrong.
The other half of the answer is your greenhouse's own base dimension, and that number is in your manual. Nominal model names are not measurements. A greenhouse sold as a "6 x 8" is not 72 by 96 inches, and building to the nominal size leaves you short of the manufacturer minimum.
The 5 inch bearing strip2 inches outside the rail, the 1 inch rail, 2 inches inside. Nothing overhangs an edge.Check your lumber firstThe member under the rail has to be at least 5 inches wide. A 6x6 carries it. Narrower stock does not.
The arithmeticStart from the base dimension in your manual
Foundation outside dimension = your base dimension + 4 inches, in both length and width. That is the 2 inch clearance on each side.
Bearing strip = at least 5 inches wide wherever the rail sits.
Open perimeter frame, inside opening = your base dimension − 6 inches. On a full slab there is no inside edge, so this one does not apply.
Two inches is a minimum on both sides, not a target. More is fine. Less is not.
We do not publish base dimensions, and here is why. Your assembly manual is the only authority for your specific unit, and a foundation is not something you can adjust once it is poured. Take the base dimension straight from your own manual, then apply the arithmetic above.
Where to find your manual. Open your greenhouse’s product page on this site and look under the Download tab. If you cannot find it, call us on 1-877-322-5487 and we will read the figure out to you.
Top viewThe base sits centred, with the same clearance on all four sides.Steel base profileThe galvanized rail is about 1 inch wide with a 2.72 inch cross section.Aluminum-frame modelsOn a solid foundationThe rail is anchored straight down into the concrete, with 5 cm (2 in.) of foundation beyond it on every side.Masonry anchors not supplied
Natura owners, your strip is wider. The Natura needs a mounting surface at least 6 inches (17 cm) wide, with the base centred and at least 2 inches (5 cm) of solid material each side. See the Natura section below. Rion resin models follow the standard 2 inch rule.
Step 3. Building a wood frame, step by step
The wood frame is the most common build and the one we get asked about most. Cedar or pressure-treated lumber both work. A 6x6 is the usual choice, because at 5½ inches it carries the rail on its own.
Wood frame buildAllow half a day for a 6 ft. or 8 ft. model
Get the real base dimensionsFrom your assembly manual, on your greenhouse’s product page under the Download tab. Do not use the nominal model size.
Prepare the groundStrip off sod and topsoil, then lay and compact 3 to 4 inches of clear crushed gravel where the frame will sit. Gravel is what keeps the timber out of standing water and gives frost somewhere to go.
Check the lumber is wide enoughThe rail needs a 5 inch bearing strip, so the member under it must measure at least 5 inches across. A 6x6 is 5½ inches and carries it. Measure what you buy, because dressed lumber is narrower than its name.
Cut and assemble the frameBuild it 4 inches longer and 4 inches wider than the base dimension in your manual. Fasten the corners with structural screws or timber screws, not deck screws.
Square itMeasure corner to corner both ways. When the two diagonals are equal, the frame is square. Adjust before you go any further, because the greenhouse frame is built to fixed dimensions and will not forgive an out-of-square base.
Level itUse a long straightedge with a level on it, or a string line and a line level. Add or remove gravel under the low side rather than shimming with offcuts. Check the diagonals again once it is level.
Set the greenhouse base on itCentre the base so the clearance is even on all four sides, then check the diagonals of the greenhouse base itself.
Fasten it downScrew the base rail into the frame at the points shown in your manual. Anchors and masonry fasteners are not supplied with the greenhouse, so buy them to suit your foundation.
Using patio stones instead
Patio stones are the other build we get asked about, and they work. The thing to understand before you start is that the stones are not the foundation. What carries the greenhouse is the well compacted gravel pad underneath them. Lay stones straight onto soil and they will settle, they will rarely settle evenly, and they will take the greenhouse out of level and out of square with them.
Take this one outside with you. Two printable pages: the six build steps with photographs, the bearing strip diagram, and the sizing arithmetic.
Patio stone buildSame 5 inch bearing strip as every other foundation
Get the real base dimensionsFrom your assembly manual, on your greenhouse’s product page under the Download tab. Add 4 inches to the length and 4 inches to the width. That is the area your stones have to cover.
Strip the sod and build the padDig out the sod and topsoil across the whole footprint, then place and compact granular base gravel in layers. Compact each layer as you go rather than dumping it all in at once. This pad is the part that carries the load.
Screed it flat and levelLevel the pad across the whole footprint, not just at the four corners. A long straightedge with a level on it, or a string line with a line level, is what you want here.
Lay the stones tight and continuousButt them against each other so the run is unbroken everywhere the base rail will sit. Do not space them out like deck piers. A gap under the rail is a length of rail carrying the structure with nothing underneath it. 24 x 24 in. slabs are the usual choice. They are sold as 2 in. thick and measure about 45 mm in practice, and each one weighs roughly 39 kg (85 lb), so plan on two people to move them.
Check the bearing stripWherever the rail sits, you need at least 2 inches of solid stone outside it and 2 inches inside it, which is the same 5 inch bearing strip as every other foundation on this page. Nothing overhangs an edge. Natura owners need at least 6 inches.
Square it, then set the greenhouse downMeasure corner to corner both ways, and adjust until the two diagonals are equal. Centre the base so the clearance is even on all four sides, then fasten it down at the points shown in your manual.
Patio stones on bare or uncompacted ground are not a foundation. Stones set on levelled soil, on sand alone, or on fill that has not been compacted will move. It is the most common way a patio stone base fails, and you usually do not find out until the door stops latching.
One distinction worth keeping straight: the gravel under a timber frame in Step 3 is clear crushed stone, chosen because it drains freely and keeps the wood out of standing water. The gravel under patio stones is a compacted granular base with fines, sold as Granular A or crusher run, chosen because it has to carry load without settling. Two different materials doing two different jobs. As general landscaping practice, 4 to 6 inches of it, compacted in layers, is the usual figure for a patio. Palram-Canopia does not specify a gravel depth, so treat that as guidance rather than a spec.
Level and square matter more than you think
A greenhouse kit is a rigid, factory-cut structure. It has no give in it. If the base is out of level or out of square, the frame will not close up properly, and the symptoms all show up later: a door that binds or will not latch, panels that pop out of their channels, and gaps at the ridge.
Almost every "the parts do not fit" call we take turns out to be a base that is out of square. Fifteen extra minutes with a tape measure at the foundation stage saves an afternoon of frustration during assembly.
Square: equal diagonals, corner to corner.
Level: across both axes, not just the length.
Flat: no twist. A frame can be level at all four corners and still be wound like a propeller. Sight along it.
Drainage, frost and Canadian ground
This is the part that separates a foundation that is still true in year five from one that has moved.
Frost heave is water in the soil freezing and expanding, lifting whatever sits on top of it. The problem is not the lifting, it is that it almost never lifts evenly. One corner comes up more than the others, the frame racks, and the panels and door tell you about it.
There are two honest ways to deal with it, and both work:
Let it move as one piece. A frame or slab sitting on a well-drained compacted gravel bed rises and settles together, so the structure stays square even as the ground moves under it. This is what most backyard greenhouses do, and it is why the gravel step is not optional.
Get below the frost line. Footings taken down past the depth frost reaches do not move at all. More work and more cost, and it is the right answer for a permanent concrete build or an exposed, windy site.
Drainage is the lever you actually control. Saturated soil heaves hard, well-drained soil heaves much less. Clear crushed gravel under the frame, ground that slopes away from the greenhouse, and no low spot where water sits are worth more than any amount of extra concrete.
Frost depth and permits vary by municipality, so check yours. How deep frost reaches differs enormously across Canada, and whether a structure of your size needs a permit or an engineered footing is set locally, not by us and not by the manufacturer. A quick call to your municipal building department before you dig is free, and it is the only reliable answer. We are not able to tell you what your local requirement is.
Anchoring, and what wind actually does
A greenhouse is light and it has a large surface area. Empty, it is close to a sail. Fastening the base rail down to the foundation is not a finishing touch, it is what keeps the structure where you put it.
Fasteners are not supplied with the greenhouse, because they depend on what you built. Use structural or timber screws into wood, and appropriate masonry anchors into concrete, as shown in the solid-foundation diagram above. In a site that gets strong winds, additional stakes or concrete footers are worth adding, and Palram-Canopia says so directly in the base kit instructions.
Not every greenhouse we carry sits on the same thing, and the foundation advice changes slightly with it.
Galvanized steel rail, on the aluminum-frame models
The Harmony, Hybrid, Mythos, Snap & Grow, Balance, Americana and Glory all seat on a galvanized steel perimeter rail that runs the full way around. The profile is the same from model to model: a narrow rail about 1 inch wide with a 2.72 inch cross section. That consistency is why the foundation rules above apply identically across all of them. Galvanized steel is used because it resists rust, holds the frame square, and gives the structure a stable anchored footing.
Keep the two materials straight: the frame is aluminum, the base rail under it is galvanized steel. It is not an all-steel structure.
Natura, wood-look aluminum
The Natura's frame is timber-effect aluminum, not real wood. Palram-Canopia does not make a real-wood greenhouse, and the Natura's cedar look is a finish on aluminum.
The Natura's foundation has two minimums rather than one. The mounting surface must be at least 6 inches (17 cm) wide where the base sits, and the greenhouse base is centred on it with at least 2 inches (5 cm) of solid material on each side. On a full slab both happen automatically. If you are building a perimeter strip footing, a wood frame or a patio stone base, make that bearing strip at least 6 inches wide. Both figures are minimums, and nothing should overhang an edge.
Rion resin line
The EcoGrow, Grand Gardener and Prestige use a resin frame and a resin base, not the galvanized steel rail. Rion uses no aluminum and no steel in these models. Anchor them to a solid, level foundation the same way: a concrete pad or a pressure-treated timber frame both work, with at least 2 inches of foundation beyond the base on every side.
There is also an optional resin base kit for the Rion line. It is heavy-duty 100% UV-protected resin in a U-shape honeycomb design, it snaps on with push-fit assembly, and it raises the greenhouse by up to 12 cm. It can be filled with soil for a planted floor. It gives you headroom and stability, but it does not replace the foundation underneath it.
Building to the nominal size. A "6 x 8" is not 72 x 96 inches. Use the base dimension printed in your manual.
A bearing strip under 5 inches. Getting the outside dimension right and then building it on stock that is too narrow still fails, because there is nothing under the inner edge of the rail.
Out of square. The kit is cut to fixed dimensions. It will not absorb the error, so the door and panels will.
Patio stones laid straight onto soil. The stones are not the foundation. Without a compacted gravel pad under them they settle, and they rarely settle evenly.
Building on topsoil or fresh fill. Both settle. Strip down to firm ground and compact gravel back in.
Timber sitting in wet soil with no gravel under it. It rots from underneath, and it is the layer that is hardest to replace later.
Not anchoring it. An unanchored greenhouse in an exposed spot is a wind event waiting to happen. Fasteners are not supplied, so plan for them.
Still not sure?
Send us your model and a photo of the spot, and we will tell you what we would build. We have been selling these greenhouses in Canada since 2007 and we have seen most of what the ground can do to them.
The 5 inch bearing strip. Palram-Canopia's standard base detail: 2 inches (5 cm) of foundation outside the rail, the 1 inch rail, and 2 inches inside it. Both clearances are stated in the assembly manuals.
Why there is no dimension table here. Base dimensions vary by model and revision, and the manual shipped with your unit is the only authority for it. We would rather send you to the manual than print a figure that might not match your box.
Dressed lumber sizes (6x6 = 5½", 2x8 = 7¼" wide) are the standard North American finished dimensions. Measure yours before you cut.
Patio slab sizes and weights are typical Canadian retail figures and vary by manufacturer. Check the spec on the slabs you buy.
Recommended foundation types (concrete, pressure-treated wood, wood deck, paver blocks) are Palram-Canopia's. Anchors and masonry fasteners are not supplied with any greenhouse.
Gravel depths on this page are general landscaping practice, not manufacturer specifications. Palram-Canopia does not publish a gravel depth for a timber or a patio stone base. The 3 to 4 inch and 4 to 6 inch figures are standard Canadian landscaping practice and are given as guidance only. The 2 inch clearances and the 5 inch bearing strip are the manufacturer figures, and those come from the assembly manuals.
What this page does not cover. Local frost depth, permit requirements, soil bearing capacity, and site-specific engineering. These are set by your municipality and your ground conditions, and they vary widely across Canada.
Disclaimer. All information here is provided as general guidance. Your assembly manual is the authority for your specific unit. If you are unsure about your foundation, or your site has poor drainage, unstable soil or heavy exposure, consult a qualified professional or your municipal building department before you build.
Very happy with purchase. Took a while to put up and I reserve judgement on how it will stand up to a full Atlantic Canada winter, but it has survived high winds these past few weeks so it bodes well. Delivery was quick and easy.
Nice looking greenhouse. Construction was not too bad although the instructions could have been clearer with respect to choosing the side the window vent went on. The videos were of no help what so ever. Now that it is up the greenhouse seems solid and looks good.